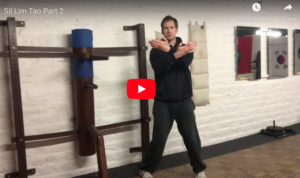
In this Wing Chun First Form Step by step guide, I’ll be discussing Siu Lim Tao – the first form, (or hand pattern) to learn in the Wing Chun system. You can also download this article here: Siu Lim Tao PDF.
Siu Lim Tao (the way of the little idea, or little idea form) is a step by step “blueprint” which, in theory contains the whole of the Wing Chun system in it. Obviously there are no steps or turns in it though; but, in principle, the form contains more information than is obvious to the casual onlooker. You can access a 5 day video series which breaks down the form, with notes by signing up here.
Wing Chun First Form Step By Step – Section 1
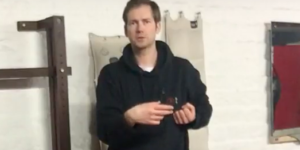
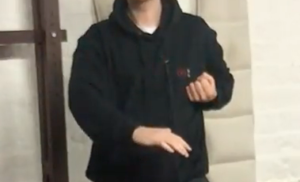
Section 1 of the first form starts with a bow. The bow is a friendly gesture and used to show respect and good intention. I like to think of the bow as an important opening gesture: whenever you practice any of the Wing Chun forms. It gives what you are doing some importance and respect. Start your form off in the manner with which you want continue. If you are sloppy with any aspect of the form, particularly the opening, your Wing Chun will be sloppy too!
So start as you mean to go on. Put your feet together for the bow, place your right fist into your left palm and nod the head. Then, pull your arms back in fists under your shoulders so your forearms are level with the floor.
Wing Chun First Section Step By Step – Opening The Stance
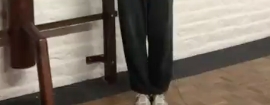
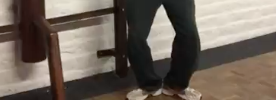
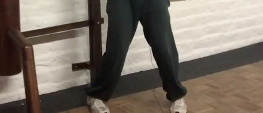
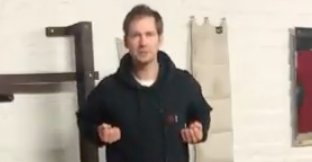
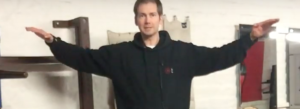
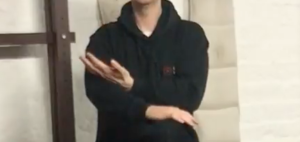
The Wing Chun basic stance is known as Yee Gee Kim Yeun Mar – Character 2 adduction stance, or goat grabbing stance. By pivoting out on the heels, and then in on the toes, you can give yourself a roughly shoulder width stance with the toes pointing in. This isn’t a fighting stance, as such, but is used to train the legs, develop sinking energy and strength. It’s a great way to train the legs while remaining in one place, or practicing something with the hands: such as the first form! The knees should point inwards in the same direction as your toes.
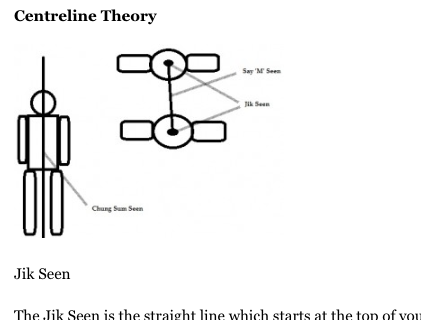
Wing Chun First Form Step By Step – Centre Line Check
There are three basic centrelines in Wing Chun theory. The Say ‘M’ Seen the Chung Sum Seen and the Jik Seen. Forgive the crude image but this should give you an idea of the basic centre lines.
Ideally, you would use a mirror to while practicing the first form. This will help you maintain correct positions and posture. After you have bowed and opened your stance the next move is to check your centreline.
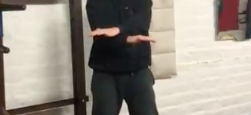
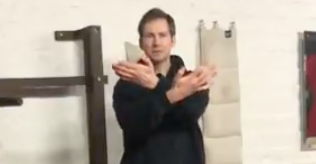
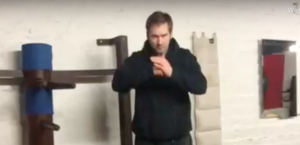
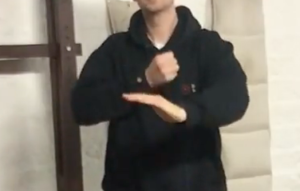
Everything relates to your centreline in Wing Chun to some extent, or the shared centreline between you and your partner/opponent. For the sake of the first form, this refers to the the straight line down the middle of your body. Crossing your arms in front of your body gives you your “centreline”. Left hand on top palms down, rotate the wrists, palms up. Then draw the hands back under the shoulders.
Wing Chun First Form Step By Step – Punches
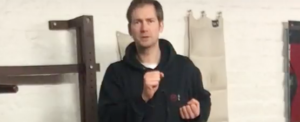
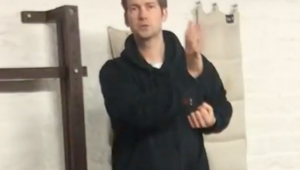
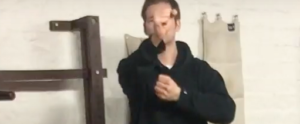
Next, bring the left fist into the centre of your body, about a fist distance away from your chest. This is your back hand position. Punch forwards with a vertical fist, keeping the knuckles of your hand in a vertical position. Open out the hand and lock the arm after you have punched.
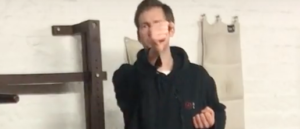
Pull the wrist back towards you and perform a wrist stretch exercise, rotating the wrist anti-clockwise as far as you can. Close the hand and draw back the arm under the shoulder. The wrist stretch exercise builds strength and suppleness in the wrist and hand. It’s also a good exercise to help improve blood flow and circulation.
Repeat on the other side.
Siu Lim Tao Step By Step – Developing Energy
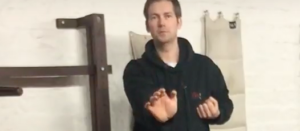
Next open your left hand and start pushing out a Tan Sau position, (palm facing upwards). Continue to push out the Tan Sau until your elbow is about 1 to one-and-a-half fist distances away from your chest. This should be done very slowly, as you are developing a relaxed, forwarding energy which will eventually feel very strong, and be able to overcome a strong, opposing force quite easily.

Concentrate on the arm that is moving, and nothing else. Imagine a force acting against your movement, but don’t encourage muscle tension. You can also think of this movement as two pulleys acting together to produce a greater force. If your shoulder and elbow joints work together simultaneously, they can create much stronger force than if they are both acting independently of each other.
Using Relaxation To Generate Power
If you encourage muscle tension, you create a weakness, rather than a strength in your technique, because you create a blockage in connecting your arm holistically to your body. This takes time to develop and understand, so start with the basic movements and practice regularly. It’s important to maintain relaxation of your position, if in any doubt. Just concentrate on the arm, and relax as much as possible.

After your Tan Sau gets to its end position (about 1-1.5 fist distances from the elbow to the body), turn the hand in and round, rotating it anti-clockwise into a Wu Sau (guard hand) position (fingers pointing upwards). Allow the elbow to drift outwards slightly to accommodate as relaxed a position as you can.

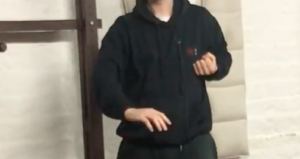
Draw the Wu Sau position back to a guard hand position, (about a fist distance from the chest). Relax the hand and drop it into a fok sau position. (see picture). Push forwards with the Fok Sau position bringing the elbow into the chest (in the centreline) as soon as possible.
Fok Sau Position (Bridging Arm)
Push Fok Sau forwards until the elbow is about 1-1.5 fist distances from the chest. Then, rotate round into Wu Sau (guard hand) position as before and draw back. Repeat this for 3 Fok Saus. After the third Fok Sau has been performed, draw the hand back as before into a Wu Sau position (guard hand). From here, relax the hand, and perform a Pak Sau to the outside line of the shoulder. Draw the hand back to the centreline and strike forwards with a Jik Jurn (straight palm).


Lock out the arm and flatten the hand, perform a wrist stretch as before and close the fist and draw the arm back. Repeat this sequence for the other side.
Second Section Of First Form Step By Step
The Siu Lim Tao second section can be used for breaking of holds and locks, and to understand correct use of explosive energy. The use of explosive energy should be used at the very end of each move. To do so, you will need to be relaxed in between each “explosion”.

Starting with the left side, open your hand and turn the palm down-facing, towards the floor. Extend the arm downwards and “explode” energy in the last inch or so of the movement. Repeat on the right hand side. Bring the hands up the side of the body, round to the lower back and perform a double palm strike to the rear. Bring the hands back to the lower back, around the body in front (fingers pointing upwards), perform a double palm strike to the front.


Bring both arms up to the chest, level with the floor, left hand on top.

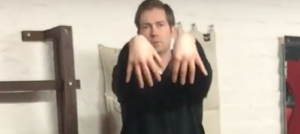
Strike out with both arms (double fak sau), keeping a slight bend on the arms. You should also be able to see in your periphery both of your hands.
Bring the arms back to the previous position but with the right arm on top. Drop in the elbows and perform a Jum Sau, (sinking elbow). Rotate wrists round into double Tau Sau position (with hands facing upwards).


Pull the hands towards you as you rotate from Tan Sau into Lap Sau (pulling hand). Strike forwards with the fingers (Biu Sau), bend the wrists at this point and lower the arms and raise them back. See images below.


Rotate the wrists outwards, close into fists and pull back the arms under the shoulders. The second section of the first form helps you understand use of explosive energy and relaxation. It’s difficult to “explode” energy when you are carrying tension already.
Therefore, in order to perform this section well, you need to learn how to let go of any muscle tension you might build while exploding force at the end of each movement. If you retain any tension, it will slow down and inhibit your later movements. This is a good philosophy for life too – to let go of (mental) baggage from the past!
Wing Chun First Form Step By Step – Third Section
The third section is the culmination of your understanding of the first two sections. You will also learn basic block and counter attack movements in the third section and the parameters of positions and techniques. If you are lucky enough to be close to a good Wing Chun class, you’ll be able to learn the first form while also learning Chi Sau. Chi sau is the “heart” of the Wing Chun system and should be practiced regularly to learn proper understanding of positions, techniques, use of energy and reactions.

The third section starts with a left hand outside Pak Sau. This Pak Sau is slightly further forwards than the previous one shown in the first section. This is because it is an outside Pak Sau rather than an inside Pak Sau. This refers to to the outside of the attacking forearm. Crossing the centreline is only done to show a potential turn, or to collect an attack which would otherwise be missed. All other positions and techniques will lie within the centreline to protect (and strike down) the fastest attacking line.

After the outside Pak Sau, drop the elbow in and bring the hand into the centre on its path towards a side palm strike (fingertips pointing outwards, elbow inwards). Lock out the arm and flatten the palm after the side palm. Then stretch the wrist as in previous sections and draw the arm back under the shoulder. Repeat on the other side.
Next throw forwards a Tan Sau straight into the centreline. Cut straight down into a low Garn Sau position above the thigh. (This shows a potential turn, hence why is across the centreline).

Scoop across centreline back into Tan Sau position (collecting an attacking arm).
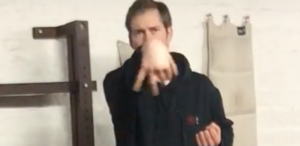
Perform a Heun Sau, circling hand, striking down with a low palm strike.

Then, lock out the arm, lift to chin level and do a wrist stretch before closing to a fist and drawing back under the shoulder. Repeat on the other side.
Push out a left Bong Sau (Wing Arm). Rotate into a tan sau, (keeping the wrist in the same place). Strike forwards with an upside down palm.


Lock out the arm after the strike and do the wrist stretch and strengthening exercise. Close to a fist and draw the arm back under the shoulder. Repeat on the other side.
Garn Sau and Hand Retrieval
Strike down the left hand into a low Garn Sau position with the wrist in the centreline. Place the right hand at the top of the left forearm, palm facing upwards. Strike down with your right hand while simultaneously drawing back with the left, twist both hands as they meet at the wrist.

Draw back the left hand, moving through guard hand position before placing the hand at the top of the right forearm as you did on the other side, palm facing upwards. Strike down again as before drawing back the left hand, twisting both hands as the hands meet. Repeat for one more downward Garn Sau strike (3 in total). On the last strike, bring back the recovering hand into a fist.
Strike forwards with your fist while bringing the Garn Sau hand up into the back fist position. Do two more punches, 3 in total, bringing your left arm back under your shoulder on the last punch. Lock out the arm, perform a wrist stretch as before and draw back. Square up your right foot, draw the feet together, straighten the legs and bow to finish.
Regular practice of the first form will help you understand position, better use of energy and relaxation in between moves. You’ll also get used to sinking your stance, which if repeated frequently over time will help you to “sink your mind” into the floor, which will make you more difficult to move by an opponent or training partner. You’ll also develop a calmer mindset, which can help in all matters in life. Keep practicing!